The 3-Prong Power Play: How to Install Your Range Cord
Homepage The 3-Prong Power Play: How to Install Your Range Cord
What You Need to Know About the 3-Prong Range Power Cord
A 3 prong range power cord is the connection between your electric range and the wall outlet — and getting it right matters for both safety and performance.
Here’s a quick overview of how to install one:
Turn off the breaker to the range circuit before touching anything.
Remove the terminal block cover on the back of the range.
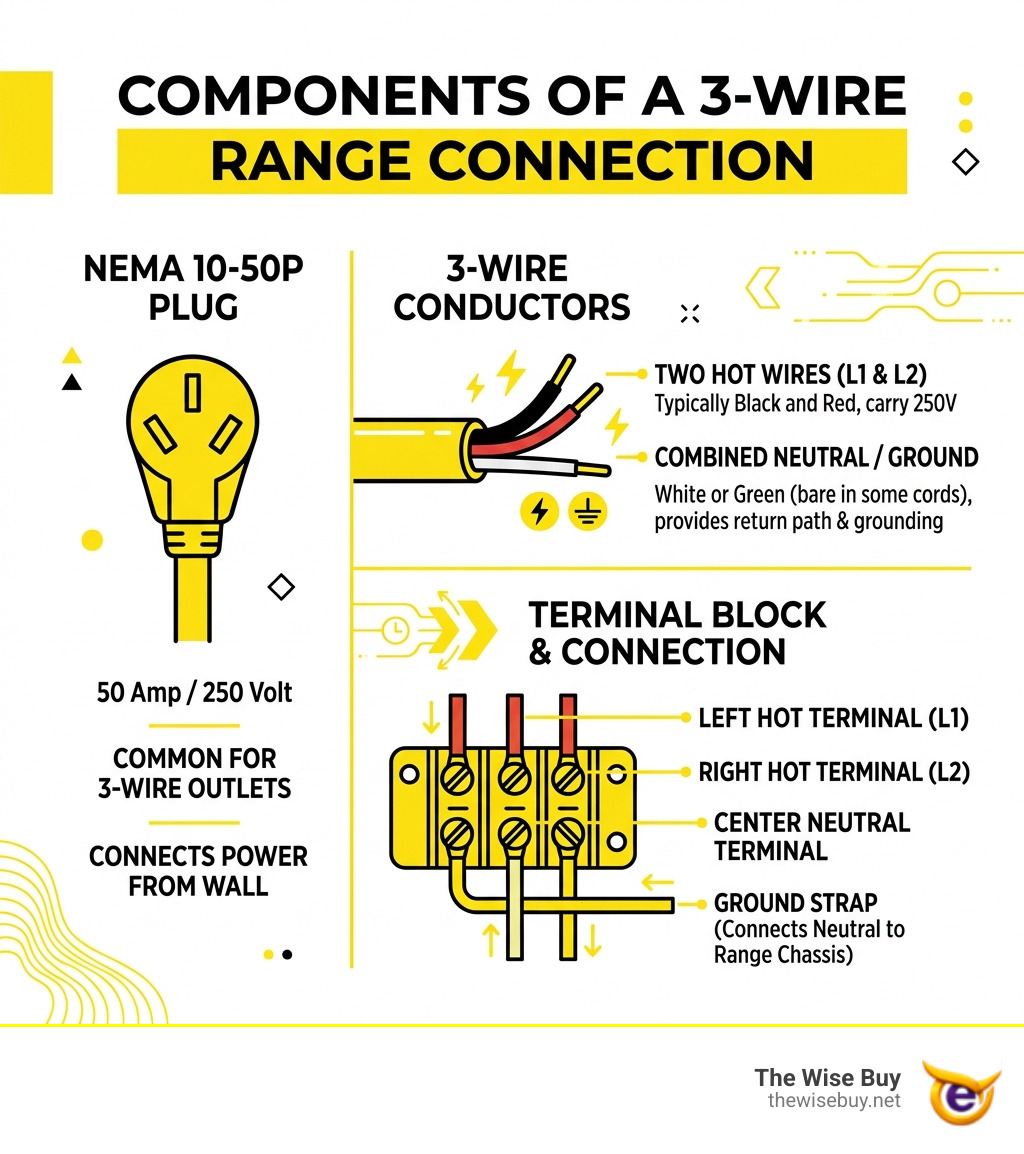
Connect the wires — black to L1 (left hot), red to L2 (right hot), and white or green to the center neutral/ground terminal.
Attach the ground strap from the neutral terminal to the range chassis.
Secure the strain-relief clamp to protect the cord where it enters the range.
Replace the cover, restore power, and test the range.
Most homeowners can complete this in about an hour, with a total material cost of $15 to $30.
These cords use a NEMA 10-50P plug, are rated for 40 or 50 amps at 250 volts, and come in lengths from 4 to 10 feet. They are designed for older homes with three-slot outlets — common in houses wired before 1996.
If your outlet has three slots, this guide is for you.
I’m Ally Wise, Sales Manager at The Wise Buy, where I work closely with appliance accessories — including the 3 prong range power cord — helping customers find the right parts for their homes every day. In this guide, I’ll walk you through everything you need to install or replace your range cord safely and confidently.
When we talk about a 3 prong range power cord, we are referring to a heavy-duty electrical cable designed to carry high-amperage current to an electric stove or oven. These cords are characterized by their three flat or angled prongs, which fit into a specific NEMA 10-50R (receptacle). In the industry, you might hear them called “Old Range” cords or “3-Wire Range” power supply cords.
The NEMA 10-50P (“P” for plug) configuration is the standard for these devices. It is rated for 50 amps and 250 volts. Because ranges are power-hungry appliances, these cords are built with thick, insulated copper conductors to prevent overheating. While modern standards have shifted toward 4-prong designs, millions of homes built before the mid-90s still rely on this 3-wire system.
Technical Specifications of a 3-Prong Range Power Cord
To ensure you are buying the right part for your kitchen, it helps to understand the “under the hood” specs. A standard 3 prong range power cord generally adheres to the following:
Amperage: Most are rated for 40-amp or 50-amp circuits. It is vital to match the cord’s rating to your range’s requirements.
Voltage: 125/250 Volts.
Wire Gauge: These cords typically use 8-gauge wire for the “hot” conductors and 10-gauge wire for the neutral, though some 50-amp heavy-duty models use 8/3 gauge (three 8-gauge wires) throughout.
Connectors: Most come with “ring terminals” or eyelets at the end of the wires. These circular metal connectors slide over the screws of the range’s terminal block, providing a more secure and vibration-resistant connection than bare wire.
Plug Style: Often features a “right-angle” or flat plug. This allows the range to sit closer to the wall without kinking the heavy cable.
When to Use a 3-Prong Range Power Cord
You should use a 3 prong range power cord only if your wall outlet has three slots. This is typically found in older homes. Prior to the 1996 National Electrical Code (NEC) update, 3-wire connections were the standard for ranges and dryers.
In these older setups, the neutral wire and the ground wire are essentially the same thing. The appliance body is grounded through the neutral conductor. If you are moving into a home with a 3-slot outlet but your new range came with a 4-prong cord, you must replace the cord with a 3-prong version to match the wall—you should never try to “adapt” the outlet by cutting off prongs!
3-Prong vs. 4-Prong Range Power Cords: Key Differences
The primary difference between these two types of cords is how they handle grounding.
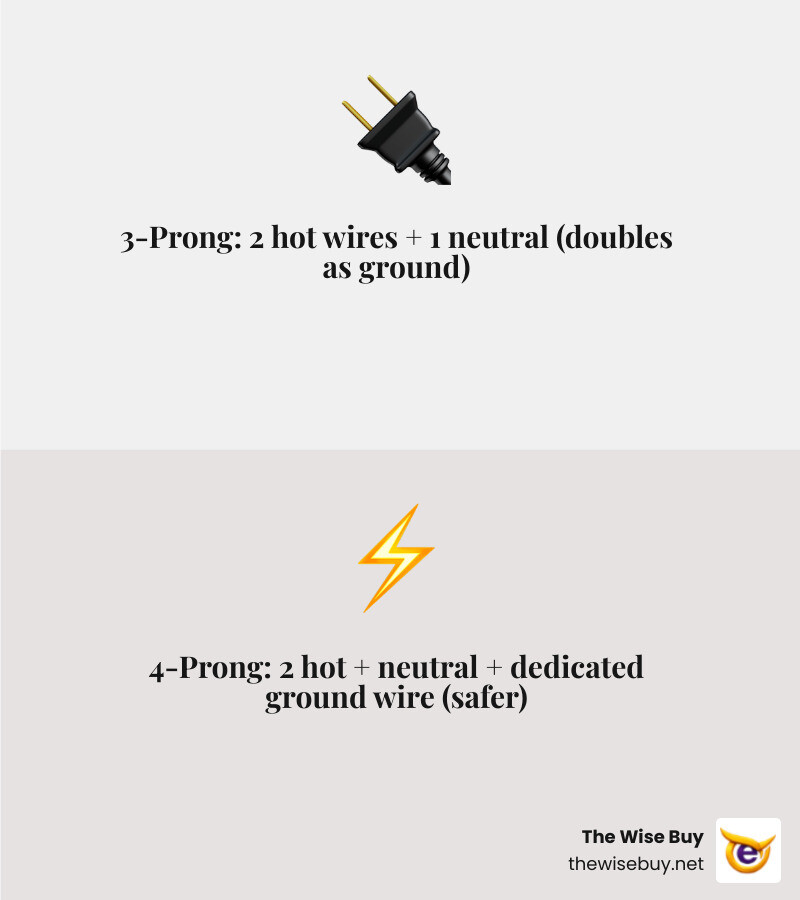
3-Prong Cords: These consist of two “hot” wires (which provide the 240V power) and one “neutral” wire. In this configuration, the neutral wire serves double duty as the ground. A metal “grounding strap” or wire must connect the range’s neutral terminal to its frame to ensure the appliance is safe.
4-Prong Cords: These have two hots, one neutral, and a dedicated, separate green ground wire. This is considered safer because the grounding path is independent of the power-carrying neutral wire.
The 1996 NEC update mandated 4-prong outlets for all new construction to increase safety. However, the code allows existing 3-slot outlets to remain in use, which is why we still provide high-quality 3-prong options at The Wise Buy. For a deeper dive into choosing the right fit for your specific appliance, check out our guide on The Right Connection: How To Choose And Replace Any Appliance Power Cord.
Preparation: Tools and Safety Precautions
Before we get our hands dirty, we need to talk about safety. Working with 240V electricity is no joke. Even if the stove is off, the wires are “live” unless the circuit breaker is flipped.
Essential Safety Checklist:
Power Off: Always turn off the circuit breaker at the main electrical panel. Use a voltage tester to verify the outlet is dead before touching the terminal block.
PPE: Wear rubber-soled shoes and safety glasses.
Correct Amperage: Ensure your new 3 prong range power cord matches the amperage of your range (usually 40 or 50 amps). Using a lower-rated cord can lead to a fire hazard.
Tools You’ll Need:
A multi-head screwdriver (usually Phillips #2).
Pliers or a nut driver (depending on the terminal screws).
A strain-relief clamp (this usually comes with the new cord).
A flashlight (it gets dark behind those big appliances!).
Step-by-Step Guide: How to Install a 3-Prong Range Power Cord
Connecting a power cord to an electric stove typically costs between $15 and $30 if you do it yourself, and it usually takes about an hour of your time. Follow these steps to get it done right.
Accessing the Range Terminal Block
First, pull the range away from the wall so you have enough room to work. Look at the back of the appliance, usually near the bottom. You will see a small metal cover plate held in place by one or two screws.
Unscrew the cover plate: Remove the screws and set them aside in a safe place (like a magnetic tray or a cup).
Identify the terminals: Once the cover is off, you will see three brass or silver-colored screws. These are the terminals where the cord wires will attach.
Safety Check: Use your voltage tester one last time on these terminals to ensure there is absolutely no power flowing.
Connecting the Wires to the Terminal Block
This is the most critical part of the installation. In a 3-wire setup, the wiring is usually color-coded, but the position on the block is what matters most.
The Center Terminal (Neutral): On a 3-prong cord, the center wire is the neutral. Connect this to the center screw on the terminal block. Crucial Step: Ensure the range’s internal ground strap (a small metal strip or white wire) is connected between this center terminal and the range’s metal frame.
The Outer Terminals (Hot): The two outer wires on the cord are the “hot” wires. Connect one to the left terminal and one to the right terminal. It generally doesn’t matter which hot wire goes to which side, as both carry 120V to create the 240V total.
Tighten Securely: Use your screwdriver to tighten the screws firmly. A loose connection can cause “arcing,” which generates heat and can melt the terminals. Ensure each terminal has only one wire from the cord attached to it.
Securing the Strain-Relief Clamp
Never skip the strain-relief clamp! If someone trips over the cord or the range is moved suddenly, this clamp prevents the wires from being pulled out of the terminal block, which could cause a short circuit or a fire.
Insert the clamp: The clamp usually comes in two halves. Insert them into the large hole where the cord enters the range.
Position the cord: Place the 3 prong range power cord between the two halves of the clamp.
Tighten the screws: Tighten the clamp screws until the cord is held firmly in place. Do not overtighten to the point of crushing the insulation, but ensure the cord doesn’t move when tugged.
Final Inspection: Double-check that all wires are tight and that no stray copper strands are touching the metal casing. Replace the terminal cover plate and screw it back on.
Frequently Asked Questions about 3-Prong Range Power Cords
Can I use a 3-prong range cord for an electric dryer?
We get this question a lot, and the answer is a firm no. While they look similar, range cords and dryer cords are not interchangeable.
Amperage: Ranges typically require 40 or 50 amps (NEMA 10-50P), while dryers only need 30 amps (NEMA 10-30P).
Plug Size: The prongs on a range cord are larger and spaced differently than those on a dryer cord. Attempting to force a range cord into a dryer outlet (or vice versa) is a major safety hazard and won’t work.
How much does it cost to replace a range power cord?
If you take the DIY route, your only cost is the cord itself. A high-quality 3 prong range power cord typically costs between $15 and $30 at retailers like The Wise Buy. If you were to hire a professional electrician, you might pay an additional $75 to $150 for a service call. Since this is an “intermediate” skill level task that takes about an hour, many homeowners find it to be a very cost-effective DIY project.
What is the standard length for a range power cord?
Most standard cords are 4 feet long, which is usually sufficient for an outlet located directly behind the stove. However, we know that kitchen layouts aren’t always perfect. You can find cords in 6-foot and even 10-foot lengths.
A 10-foot cord is particularly useful if your outlet is located in a basement or an adjacent cabinet. When choosing a longer cord, ensure it is a heavy-duty 50-amp model made with copper wire to handle the distance without a significant voltage drop.
Conclusion
Mastering the installation of a 3 prong range power cord is a fantastic way to save money and ensure your kitchen is running safely. Whether you are moving into an older home or simply replacing a worn-out cable, the key is matching your outlet, securing your connections, and never skipping the strain-relief clamp.
At The Wise Buy, we believe in “smart deals” and “smarter shopping.” We provide the quality parts you need with the expert advice to back them up. If you find that your home actually requires a more modern setup, you might be looking for the Utilitech Utr628206 6 Ft 50 Amp 4 Prong Black Range Appliance Power Cord.

 Add more eligible items to your cart to unlock free shipping.