The Right Connection: How to Choose and Replace Any Appliance Power Cord
Homepage The Right Connection: How to Choose and Replace Any Appliance Power Cord
Why Appliance Cord Replacement Matters for Home Safety and Savings
Appliance cord replacement is a simple DIY repair that saves money and prevents hazards. Instead of discarding an appliance when the cord fails, you can often fix it for under $10 in about 30 minutes.
Quick Guide: When and How to Replace Your Appliance Cord
Replace immediately if: Cord is frayed, plug is cracked, you see smoke, or the plug feels warm.
Key rule: Never use tape to repair a cord; always replace it.
Damaged cords are common in high-use items like vacuums and irons. A damaged cord is a fire hazard that requires immediate attention. Most repairs involve removing the damaged part, matching the replacement exactly, and connecting wires correctly.
When to Replace Just the Plug vs. the Entire Cord:
Damage Location
Solution
Why
Plug end only
Replace the plug
Cost-effective and fast
Near appliance
Replace entire cord
Cannot safely shorten cord significantly
Middle of cord
Replace entire cord
Never use joiners or splices
Multiple points
Replace entire cord
Safest option
Modern plugs are polarized (one blade is wider), and connecting wires incorrectly creates a shock hazard. I’m Ally Wise from TheWisebuy.net, and I’ve helped many customers find the right parts to prevent costly safety issues.
Identifying When You Need an Appliance Cord Replacement
Recognizing the signs of a damaged cord is the first step in preventing electrical shocks and fires. Wear and tear from constant flexing, yanking, or pet damage are the most common culprits.
Critical warning signs for appliance cord replacement include:
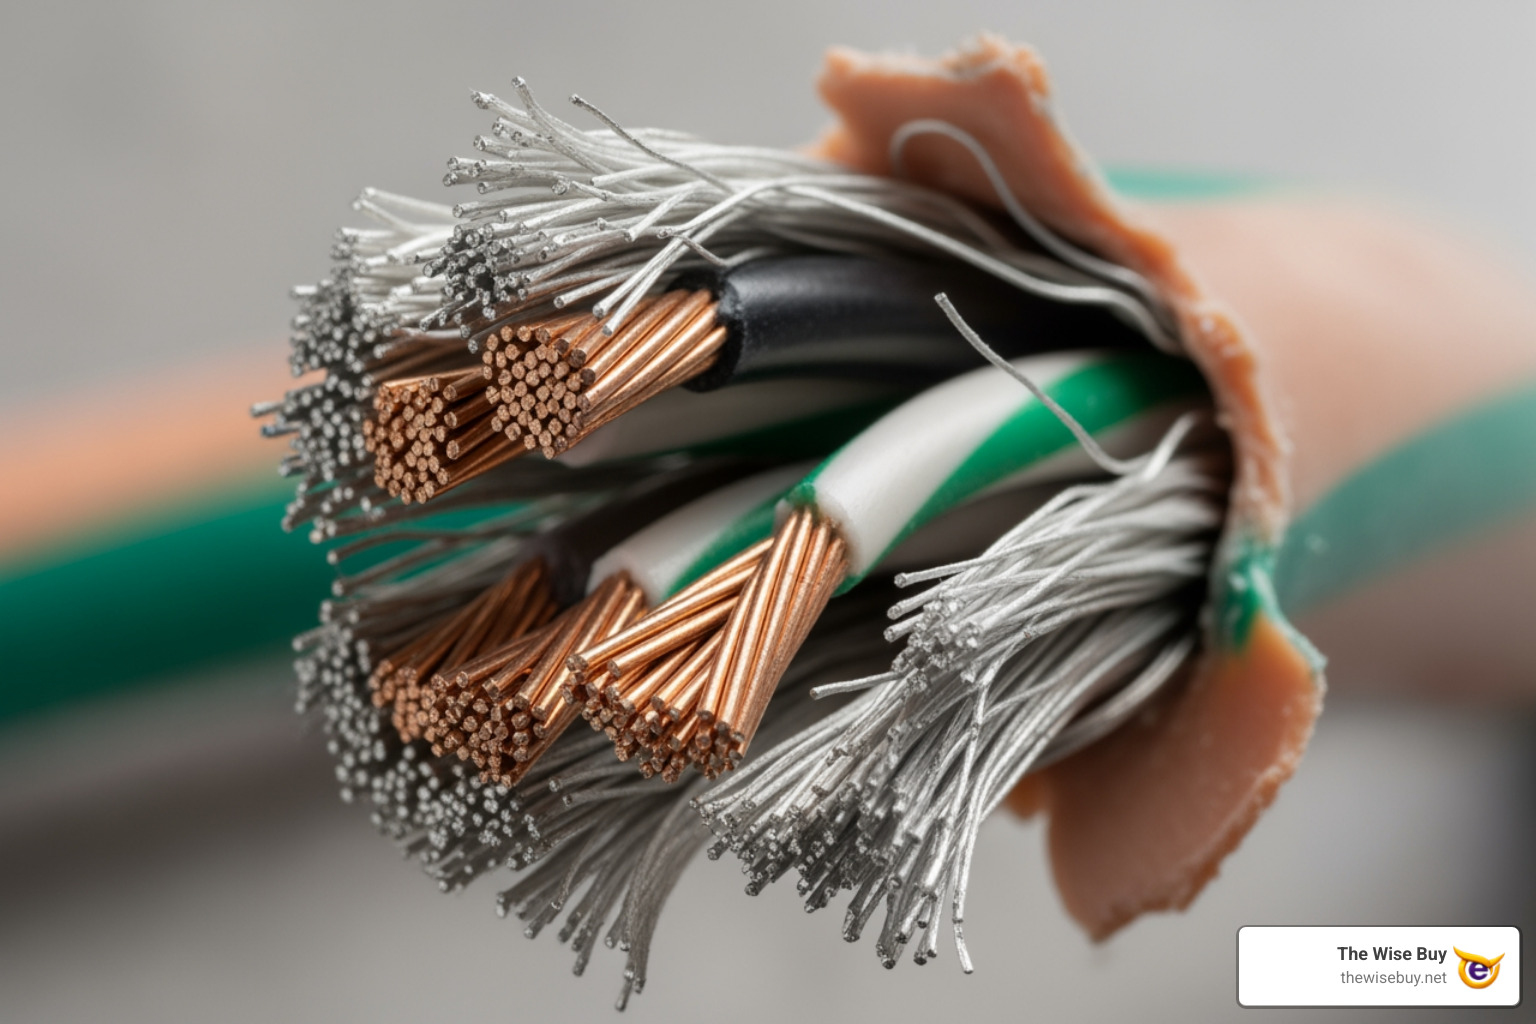
Frayed Wire Insulation: If the outer casing is cracked or split, exposing inner wires, it is an immediate hazard.
Sparking or Smoke: Any sparking or burning smells require you to unplug the appliance immediately.
Heat Damage: A plug or cord that feels hot during use indicates excessive electrical resistance.
Cracked Plugs: Broken housing can compromise internal connections and lead to arcing.
Bent Contacts: Loose or corroded prongs won’t make proper contact, causing overheating in the outlet.
Pet Damage: Even minor chew marks can indicate internal damage that compromises safety.
Intermittent Power: If the appliance flickers when the cord is moved, there is a break in the connection.
Never attempt to repair a defective cord with electrical tape. These temporary fixes are ineffective and increase fire risks. For more details, see How to Replace Electrical Cords & Plugs.
Essential Tools and Safety Precautions
Proper appliance cord replacement requires a few basic tools and strict adherence to safety rules.
Required Tools
Wire Strippers: For removing insulation without damaging copper strands.
Screwdriver Set: Phillips and flat-head for opening housings and terminals.
Multimeter: To verify connections and check for short circuits.
Replacement Cord or Plug: Must match the original specifications.
Utility Knife: For carefully scoring thick outer jackets.
Safety First: Our Golden Rules
ALWAYS UNPLUG THE APPLIANCE: Never work on a live device.
Inspect the Appliance: Ensure the damage is limited to the cord before proceeding.
Use Identical Replacements: Match the gauge, length, and plug configuration exactly. Undersized cords cause fires.
No Joiners or Tape: Replace the entire cord or the plug end; never splice wires.
Work in a Well-Lit, Dry Area: Ensure visibility and avoid water to prevent accidents.
Follow Instructions: Adhere to the guidance provided with your replacement parts.
Call a Professional: If you are uncomfortable with the repair, contact a service like those available in Buffalo Grove, IL.
Choosing the Correct Replacement Cord and Plug
Selecting the right part is vital. You must match the original’s voltage, amperage, and configuration.
Types of Plugs
Polarized Plugs: One blade is wider than the other to ensure correct hot/neutral orientation.
Grounded 3-Prong Plugs: Includes a third prong for grounding, essential for metal-cased appliances.
Non-Polarized Plugs: Found on older, low-power devices; upgrade to polarized if possible.
Types of Appliance Cords
Light-Duty (18-16 Gauge): Used for lamps, clocks, and small electronics.
Medium-Duty (16-14 Gauge): Common for toasters, blenders, and power tools.
Heavy-Duty (12-10 Gauge): For air conditioners and high-wattage kitchen appliances.
Pigtail Cords: Pre-assembled for 240-volt appliances like dryers.
Identifying the Correct Replacement
Check the appliance label for voltage and amperage. The wire gauge (thickness) is often printed on the cord; lower numbers indicate thicker wire.
Wire Gauge
Typical Amperage
Common Appliance Types
18-Gauge
Up to 7 amps
Lamps, clocks, phone chargers
16-Gauge
Up to 10 amps
TVs, blenders, fans
14-Gauge
Up to 15 amps
Microwaves, vacuums, refrigerators
12-Gauge
Up to 20 amps
Air conditioners, washing machines
10-Gauge
Up to 30 amps
Portable heaters, water heaters
8-Gauge
40-50 amps
Electric ranges, clothes dryers (240V)
Always use an identical replacement. If damage is in the middle of the cord, replace the entire unit.
Step-by-Step Guide to the Replacement Process
Preparing for Your Appliance Cord Replacement
Unplug the Appliance: Verify it is disconnected.
Access the Connection: Open the housing using a screwdriver. Take photos of the internal wiring for reference.
Note Routing: Observe how the cord uses grommets and strain relief clamps. You must replicate this.
Disconnect the Old Cord: Unscrew terminals or remove wire nuts. If connections are soldered, professional help may be needed.
Prepare the New Cord: Strip 1 to 1.5 inches of the outer jacket and 1/2 inch of insulation from each inner wire. Twist the copper strands to prevent fraying.
Connecting Wires to the New Plug
Identify Terminals:
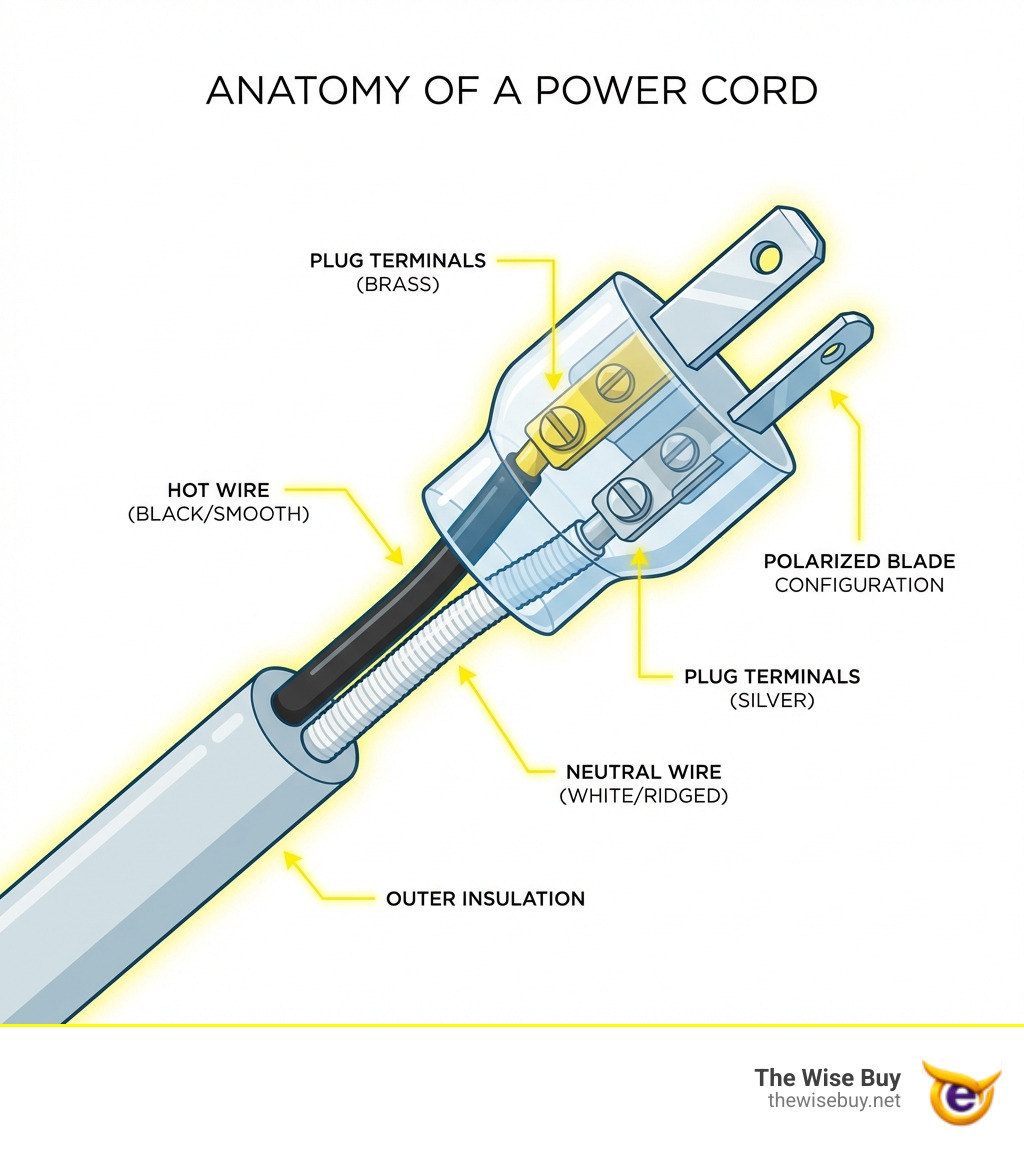
Hot (Black/Smooth): Connects to the narrow blade (brass screw).
Neutral (White/Ridged): Connects to the wide blade (silver screw).
Ground (Green/Bare): Connects to the round prong (green screw).
Slide Case On: Put the plug’s outer casing onto the cord before making connections.
Attach Wires: Form hooks and wrap them clockwise around the screw terminals. Tighten firmly.
Reassemble: Secure the plug case and ensure the internal separator is in place.
Connect to Appliance: Route the cord through the strain relief and connect the wires to the internal terminals (black to black, white to white).
Special Considerations for High-Voltage Appliances
High-voltage appliances (240V) like dryers and ranges require heavy-duty “pigtail” cords. These are pre-assembled with molded plugs for safety.
NEMA Configurations
NEMA 10-30: Older 3-prong dryer plug (two hot, one neutral/ground).
NEMA 14-30: Current 4-prong dryer standard (two hot, one neutral, one ground).
NEMA 10-50 / 14-50: Used for electric ranges, rated for higher amperage.
3-Prong vs. 4-Prong Dilemma
In older homes, such as those in Buffalo Grove, IL, you may find 3-prong outlets. Modern codes require 4-prong systems.
Converting to 4-prong: Safer; requires removing the appliance’s internal bonding strap to separate neutral and ground.
Converting to 3-prong: Generally discouraged. It is safer to have an electrician install a 4-prong outlet.
Proper grounding is critical. The green wire must be securely attached to the appliance’s metal frame to prevent shocks. If the internal wiring looks complex, consult a licensed electrician.
Final Testing and Safety Verification
Testing ensures your DIY appliance cord replacement is safe and functional.
Testing Your New Appliance Cord Replacement
Visual Inspection: Ensure screws are tight, no stray strands exist, and the strain relief is secure.
Multimeter Testing (Unplugged): Set your multimeter to continuity mode.
Hot Wire: Check continuity between the narrow blade and the internal black wire terminal.
Neutral Wire: Check continuity between the wide blade and the white wire terminal.
Ground Wire: Check continuity between the round prong and the appliance chassis.
Short Circuit Test: Ensure there is NO continuity between the hot and neutral blades, or between any blade and the ground prong. If a beep occurs, you have a short.
Functional Test: Plug the appliance in and turn it on. Watch for heat, smoke, or smells. If it operates normally, the repair is successful.
Frequently Asked Questions about Appliance Cords
Can I just use electrical tape to fix a frayed cord?
No. Electrical tape lacks the structural integrity and insulation needed for power cords. It can degrade and cause fires. Always perform a full appliance cord replacement if the insulation is compromised.
How do I know which wire is the “hot” wire?
Color: Usually black or red.
Texture: On 2-wire cords, the hot wire is smooth, while the neutral wire has ridges.
Terminals: The hot wire connects to the narrow blade and the brass-colored screw.
Multimeter: Use a continuity test to confirm the path from the narrow blade.
Is it better to replace the whole cord or just the plug?
Replace Just the Plug: If damage is only at the very end (cracked housing or bent prongs). This is fast and cheap.
Replace the Entire Cord: If damage is in the middle, near the appliance, or in multiple spots. Splicing is never safe.
Conclusion
Appliance cord replacement is a vital skill for maintaining home safety and extending the life of your electronics. By following these steps, you can avoid hazards and save on repair costs.
At The Wise Buy, we provide smart deals for appliance cords and smarter shopping to help you maintain your home efficiently. From tools to replacement components, we offer quality products with free shipping on orders over $100. Explore our selection for your next DIY project.

 Add more eligible items to your cart to unlock free shipping.