Start With the Job: Matching Tools to Your Intended Use
Buying tools works best when you start with the task, not the product page. A tool that fits your job will outlast a fancier one that doesn’t.
So before you spend anything, answer three questions:
What is the task? Hanging shelves is not the same as building a deck.
How often will you use it? A one-time job rarely justifies a pro-grade purchase.
Where will you use it? Indoor work has different needs than outdoor work.
The U.S. Consumer Product Safety Commission tracks tool-related injuries each year, and most stem from misuse rather than bad equipment. The right tool for the job is also the safer one. Write your answers down.
Pro Tip Buy for the job you have this month, not the hobby you might start next year. Most garages are full of tools bought for projects that never happened.
How to Choose Tools for DIY Projects Without Overspending
Choosing tools for DIY projects comes down to one rule: spend where you’ll use it, save where you won’t. A few good core tools beat a big box of cheap ones.
Here’s how we’d approach it:
List the projects on your list for the next year. Be honest about scope.
Identify tools used across multiple projects. A drill and a tape measure earn their keep fast.
Buy mid-range for your most-used tools. Cheap versions of daily tools fail first.
Borrow or rent for one-time jobs. A tile saw you’ll use once is a rental, not a purchase.
Add specialty tools only as projects demand them.
Repairability matters too: a tool with replaceable parts costs less over its life than a sealed unit, so check that spare blades, bits, or batteries are easy to find before you commit.
A common mistake is buying a huge kit on sale and using four of the twenty pieces. Start small and grow as your skills and projects grow.
Hand Tools vs. Power Tools: Which Belongs in Your Toolbox
Hand tools and power tools serve different purposes, and most toolboxes need both. Hand tools give you control, quiet, and precision; power tools give you speed and less strain on repeated work.
For a first toolbox, start with hand tools: a hammer, screwdrivers, pliers, an adjustable wrench, and a tape measure. Add a cordless drill next, that combination handles most home repairs.
What to Check When Buying Tools: Build Quality and Materials
Checking build quality is the single most important step when buying tools. Materials and construction tell you how a tool will hold up before you use it.
Run through these checks:
Material choice: Look for forged steel in striking tools and hardened steel in bits and blades. Plastic housings are fine in some spots, but not at stress points.
Finish: A clean, even finish usually signals better manufacturing. Rough edges and sloppy paint hint at shortcuts.
Stress points: Check where the tool flexes or takes impact. Cracks, gaps, or thin metal here are red flags.
A tool with a solid build and good materials will outlast a cheaper one with a flashy label. If you’re shopping online, look closely at the photos and read the full condition notes before you buy.
Watch Out A shiny exterior can hide a cracked casting or a botched repair. Always check the stress points and moving parts, not just the finish. A tool that jams under load can slip and cause injury.
Used Tool Inspection Checklist: Stress Points, Moving Parts, and Visible Damage
A used tool inspection checklist protects your money and your safety. Used tools can be excellent value, but only if you check them properly.
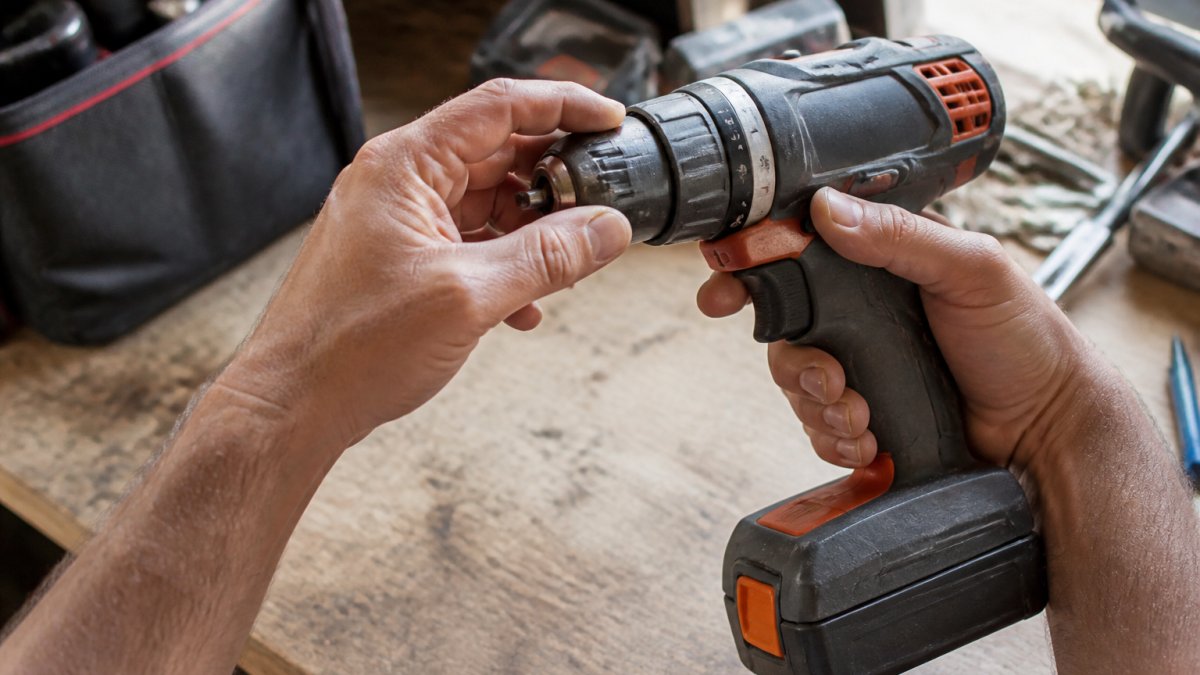
Close-up of a person’s hands rotating the chuck of a used cordless drill on a workbench, inspecting it for play and wear under bright natural light
Check for visible damage. Look for cracks, dents, rust, and bent parts.
Inspect broken castings. Hairline cracks near the handle or head are deal-breakers.
Look for botched repairs. Mismatched screws, glue, or welded patches signal trouble.
Confirm all major components are present. Missing parts are often hard to replace.
Test every moving part. Chucks, triggers, and switches should operate smoothly.
Check for jamming. A tool that sticks under light pressure may fail under load.
Ask about operating condition. Does it run, spin, or cut as it should?
Review maintenance history. Regular care shows in how the tool looks and feels.
If you’re buying online, ask for clear photos of the stress points and any wear. Read the full condition description before you commit.
Key Takeaway The best used tool is one you can inspect fully before buying. Photos of the stress points and moving parts tell you more than any sales pitch.
What to Look for When Buying Used Power Tools
What to look for when buying used power tools goes beyond a quick glance. Power tools have more wear parts than hand tools, so follow a fixed order: inspect unplugged, test powered, then decide. Skipping the unplugged stage is how buyers miss cracked housings, frayed cords, and missing guards that a running motor can mask.
Stage 1: Inspect while unplugged or with the battery removed
Do this before anything is powered on, the only safe time to put your hands near a blade, bit, or chuck.
Housing and castings: Look for cracks, especially around the handle, gear case, and where the motor meets the body. A hairline crack near a mounting screw is a deal-breaker.
Cord and strain relief (corded tools): Run your hand along the full length of the cord. Fraying, exposed conductors, taped repairs, or a loose strain relief at the housing are safety issues, not bargaining points. A damaged cord means the tool should not be powered on at all until it is repaired.
Plug: Check for bent prongs, a cracked body, or a missing ground pin on a three-prong plug.
Stage 2: Test powered, only if Stage 1 passes
Power on only after the unplugged inspection is clean. If a seller won’t let you run the tool, treat that as a no.
Listen at start-up and run: A healthy motor spools up smoothly. Grinding, rattling, or a high-pitched whine that changes with speed points to bearings or brushes.
Check speed control: Variable-speed triggers should ramp smoothly, not jump or cut out.
Load it lightly: For a drill, chuck a bit and drill into a scrap of wood. For a saw, make a short cut in scrap. For a sander, press it against a scrap board. Vibration, bogging, or burning smells are red flags.
Stage 3: Match the tool to the material and the job
A used tool that is mechanically sound can still be the wrong tool. Confirm the blade or bit size, arbor, and power rating suit the material you’ll cut, drill, or sand. An underpowered saw forced through hardwood overheats and wears out fast.
Watch Out Never power on a tool with a damaged cord, a missing guard, or a cracked housing just to ‘see if it works.’ Those are the exact conditions that cause the injuries the Occupational Safety and Health Administration warns about with guarded power tools.
If you’re buying online, ask for close-up photos of the cord, guard, chuck, and battery contacts, and read the full condition description before you commit. When you shop with us, every listing includes detailed photos and condition notes covering exactly these points.
Key Takeaway The order matters: inspect unplugged, test powered, then match to the job. A tool that passes all three is a smart used buy; one that fails any stage is a pass.
Tool Compatibility Guide: Batteries, Chargers, and Accessories
Tool compatibility is where cordless buyers get burned. Batteries and chargers usually work only within one brand’s platform, and even within a brand, older and newer packs may not interchange. These checks save you from a drawer full of unusable packs.
Understand what ‘platform’ actually means
A battery platform is the combination of the pack’s physical mount, terminal layout, and the voltage and chemistry the tool and charger are designed for. Two packs can look similar and still not work together. Before you buy any cordless tool, confirm:
Mount and terminals: The pack should seat firmly with no wobble and no forcing. Bent or corroded terminals in the tool or charger are a stop sign.
Voltage match: The tool, battery, and charger must all be rated for the same voltage. A higher-voltage pack on a lower-voltage tool, or the reverse, is a safety and durability problem, not a upgrade.
Chemistry and generation: Within a brand, older and newer battery generations often do not interchange even at the same voltage. Check the model numbers on the pack, tool, and charger, not just the brand name.
Check for discontinued platforms before you commit
A common trap is buying a used cordless tool on a platform the maker has retired. The tool may be fine, but replacement packs and chargers become hard to find and expensive. Before buying, confirm the battery model is still sold new; if it isn’t, the tool’s usable life is limited by the packs you can find.
Be cautious with adapters
Third-party battery adapters bridge platforms, but they aren’t a free lunch. Adapters can bypass the tool’s low-voltage cutoff or the pack’s temperature sensing, risking over-discharge or overheating. Treat an adapter as a workaround, not a substitute for matching platforms, and never use one to run a pack the tool wasn’t designed for.
Accessories: match the tool to the material
Accessory compatibility is simpler but just as important. Confirm the chuck size, arbor, and blade or bit shank before you buy, and match the accessory to the material, a wood blade won’t cut tile, and forcing it wears out both blade and tool. Check that consumables, blades, bits, sanding pads, batteries, are still sold separately and easy to source; a tool with no available consumables is a dead end.
Pro Tip Before buying a used cordless tool, confirm the battery and charger are included and still sold separately, and check the model numbers on all three. A great deal on a bare tool becomes a bad deal if you cannot power it.
If you are starting fresh, pick one battery platform and stay on it. That single decision saves money and frustration for years. When you shop with us, the listing photos and full condition description show the battery, charger, and model details so you can verify compatibility before you buy.
Conclusion
Buying tools is a skill, and it rewards patience over impulse. Match the tool to the job, check build quality and materials, and inspect every stress point and moving part before you pay.
At The Wise Buy, we make that easier. Every item is tested and inspected, and each listing includes detailed photos and full condition notes so you can judge it before you buy.
Frequently Asked Questions
How can you tell if a used power tool is in good condition?
Run the tool before you buy it. Listen for grinding or rattling, feel for vibration, and check that the chuck or blade spins without wobble. Inspect the cord for nicks and the housing for cracks. Ask about battery age on cordless models, since cells degrade over time. If you are shopping online, read the full condition description and study the listing photos closely before committing.
What should you check before buying a hand tool?
Open and close every moving part, such as pliers or a ratchet, and confirm the action is smooth with no jamming. Look for cracked castings, bent jaws, or stripped screws from botched repairs. Check that the handle fits your hand comfortably, since ergonomics affect control during repeated use. Confirm the finish is intact and that no major components are missing before you pay.
How do you know whether a tool is compatible with your existing equipment?
Check the battery platform first. Cordless tools only work with the same brand’s battery line, and older models may use discontinued packs. Confirm the charger matches the battery chemistry and voltage. For accessories, verify the chuck size, blade arbor, or bit shank fits your tool. Keep a simple compatibility list in your toolbox so you do not buy duplicates that never get used.
Should beginners buy new tools or used tools?
Used tools stretch a beginner’s budget further, but only if you inspect them carefully. Check stress points, moving parts, and visible damage, and test the tool safely before purchase. New tools come with warranties and predictable condition. Many DIYers mix both: new for precision items like measuring tools, used for heavier items like workbenches and clamps where wear is easy to spot.

 Add more eligible items to your cart to unlock free shipping.