Homepage How to Organize a Small Rental Closet on a Budget
Last Updated: November 7, 2026
Quick Summary
Cheap closet organization for renters starts with damage-free pieces that rest, lean, or hang instead of screwing into walls. Good first options include a second tension rod, fabric-wrapped cardboard bins, a board shelf resting on supports, and stacked crates. Measure your closet first so you only buy what fits.
Measure the closet’s width, depth, and height before buying any organizer.
A second tension rod below the first adds a hanging row without drilling.
Seal cut cardboard edges so moisture and pests cannot get in.
Test a tension rod with a few items before loading it fully.
Keep heavy items centered on shelves and stack crates no more than three high.
Why Renters Need Closet Organization That Comes Out Clean
A small closet can hold far more than most renters expect, but only if the space is used well.
For renters, the goal is simple: add storage without leaving marks, holes or sticky residue when you move out. Fortunately, you do not need expensive built-ins to do it.
The ideas below focus on low-cost, damage-free changes that work in most rental closets.
Cheap Closet Organization Hacks for Renters DIY Projects
Store-bought organizers are convenient, but many renters find that the lowest-cost closet upgrades are the ones they assemble themselves from materials they already have or can pick up inexpensively.
Below are four renter-safe projects, each with a rough supply list, a build outline, and the removal step that protects your deposit. Pricing depends on the items you choose, quantity and delivery, so confirm current prices on The Wise Buy website before you buy.
1. Fabric-wrapped cardboard bins
Supplies: sturdy moving boxes or shipping cartons, a yard or two of fabric or a roll of contact paper, scissors, a glue gun or double-sided tape.
Build: cut the box down to the height you want, wrap the outside and fold the fabric or paper over the top edge, then line the inside with the leftover material so the raw cardboard is hidden.
Best for: folded sweaters, socks, and off-season items on a high shelf.
Removal: these are freestanding, so they lift straight out. Recycle or flatten them at move-out.
Watch out: bare cardboard attracts moisture and pests in humid closets, so seal all cut edges with paper or tape rather than leaving raw corrugated edges exposed.
2. Tension-rod second hanging row
Supplies: one spring-loaded tension rod sized to your closet’s interior width, plus a pack of S-hooks or clip rings.
Build: measure the interior width at the height where you want the second rod, buy a rod that extends at least a few inches past that measurement so it stays under tension, twist it into place, and hang lightweight items.
Best for: shirts, skirts, and kids’ clothing under an existing high rod.
Removal: twist to release; no holes, no anchors.
Watch out: tension rods rely on outward pressure, so they can slip on smooth or glossy painted surfaces or bow a lightweight wire shelf above them. Test by hanging a few items and checking for movement before loading it fully.
3. Simple plywood or reclaimed-wood shelf
Supplies: a precut board (many stores cut to size), two L-brackets or a pair of wooden cleats, and felt pads or rubber feet.
Build: for a no-drill version, rest the board on top of two freestanding shelf units or on wooden cleats that sit on the existing shelf, then add felt pads so the board does not scratch painted surfaces.
Best for: hats, bags, and folded linens above the hanging rod.
Removal: lift off; nothing is fastened to the wall.
Watch out: an unsupported board can tip if weight is concentrated on one end. Keep heavy items centered and never exceed the load the underlying supports are rated for.
4. Stacked plastic crates on their sides
Supplies: two to four matching plastic crates, zip ties (optional), and labels.
Build: set crates on their sides so the open face points out, stack them, and optionally zip-tie adjacent crates together so the stack does not separate when you pull a bin out.
Best for: bags, folded clothes, and small accessories.
Removal: cut the ties and carry the crates out.
Watch out: a tall stack of crates is top-heavy. Keep the heaviest crate on the bottom, stack no more than three high, and push the stack against a wall or the closet’s side panel.
Budget planning for DIY projects
A realistic approach is to price each project separately before you commit. Most renter DIY builds fall into three tiers: free (materials you already own, like moving boxes and spare fabric), low (a single tension rod, a pack of hooks, or a precut board), and moderate (a full crate stack or a small freestanding shelf).
Keep each project small. One weekend, one shelf, one fix. Then move on to the next problem.
No-Drill Closet Organization Options That Protect Your Walls
Renters often avoid drilling because the security deposit is on the line. Luckily, many storage options need no tools at all.
Try these non-permanent choices:
Removable hooks rated for the weight you plan to hang
Over-the-door organizers for belts, scarves and accessories
Freestanding shelves that sit on the floor or against the wall
Adhesive hooks for lightweight items, applied to clean, smooth surfaces
Before you stick anything to painted walls, test a small spot first. Some paints peel when adhesive is removed, so a quick test saves a headache later.
Very Small Closet Organization Ideas That Add Real Capacity
Small closets need smart use of vertical space, but “think up, not across” only helps if you know how much room each trick actually adds. The guidance below matches solutions to closet type and gives you a simple way to estimate the capacity you gain before you spend anything.
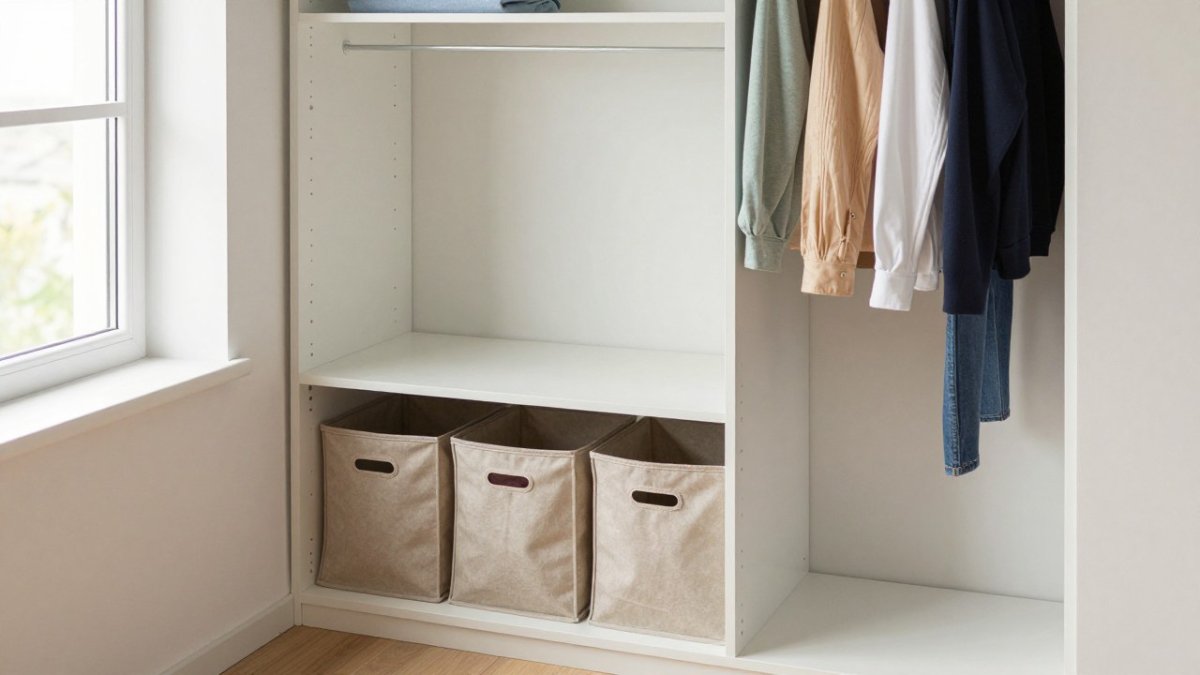
Small apartment reach-in closet with shelves, fabric bins, and hanging clothes for efficient closet organization.
Measure first, in three numbers
Before shopping, note three figures for your closet: interior width, interior depth, and height from floor to the underside of the top shelf or ceiling. Also note the height of the existing hanging rod. These four numbers tell you which hacks will fit and which will not.
Match the hack to your closet type
Reach-in closet (typically about two feet deep): depth is the constraint. A second tension rod below the first adds a hanging row without eating floor space, and over-the-door organizers use the door face rather than the interior. Avoid deep shelving units that block the doorway swing.
Walk-in closet: you have floor space to spare, so a small freestanding shelf unit or a rolling cart against a side wall adds storage without touching the walls. Keep a clear path down the middle.
Narrow closet: go vertical. Stacked crates or a tall, shallow shoe rack uses height instead of width, and multi-tier hangers condense a row of pants into the footprint of a few.
Shallow closet: skip anything deeper than the closet itself. Slim over-the-door pockets and hanging shoe bags sit flat against the door and add capacity without protruding.
Estimate the capacity you gain
You do not need exact figures to compare options, but a rough count keeps you from buying organizers that add little. A second hanging rod roughly doubles the linear hanging space in the section beneath it, so if your top rod holds a certain number of shirts, plan on a similar count below. A stack of three crates on their sides adds three open cubbies in the footprint of one crate.
The tricks that add the most room
Hang a second tension rod below the first for shirts and folded items.
Use multi-tier hangers for pants and skirts to condense a row into a few inches of rod.
Place a tension rod across the top for bags and hats.
Store off-season clothes in labeled bins on a high shelf, keeping daily items within reach.
A common mistake is buying organizers before sorting. Remove what you do not wear first, then measure what is left. You will often find the space you need is already there, and the money you would have spent on bins can go toward one well-chosen piece instead.
Watch out: a second rod hung too low leaves no room for hangers to swing, and a rod placed too high puts shirts out of reach.
Using Bins, Shoe Racks and Door Storage to Free Floor Space
Floor space disappears quickly in a small closet. Shoes, bags and laundry can take over in a few weeks.
Try these options:
Shoe racks that stand tall instead of spreading wide
Cube bins for sweaters, socks and small items
Door-mounted storage for shoes, belts and cleaning supplies
Rolling carts that tuck into a corner and pull out when needed
Keep heavy items low and light items high. This keeps the closet stable and easy to reach.
Building a Budget Closet System Step by Step
A simple system works better than a random pile of organizers. Follow these steps:
Empty the closet completely. Put everything on the bed or floor.
Sort into piles. Keep, donate, store and trash.
Measure the space. Note the width, depth and height of the closet.
Pick one storage zone at a time. Start with shoes or hanging clothes.
Choose low-cost, removable pieces. Check that each one fits your measurements.
Put back only what you use often. Store seasonal items in bins elsewhere.
Review every few months. Adjust what is not working.
Plan a total budget before you shop. Pricing depends on the items you choose, quantity and delivery, so check current prices on The Wise Buy website before you buy.
Choosing Your First Closet Upgrade and Keeping It Damage-Free
Your first upgrade should solve your biggest problem. If shoes take over the floor, start with a shoe rack.
Keep these tips in mind:
Pick items that come apart without tools
Avoid adhesive on fresh paint or textured walls
Check the weight rating on every hook and rail
Take photos of the closet before you move in and before you move out
Want to see furniture and storage options before you decide? Browse our current furniture selection and check the full condition details on each listing before you buy.
Here is a quick guide to picking your first upgrade and keeping your rental closet damage-free.
Problem
Best first upgrade
Damage-free tip
Shoes take over the floor
Shoe rack
Choose a tall rack instead of a wide one
Shirts wrinkled on the floor
Extra rod or hanging shelf
Pick items that come apart without tools
Overloaded hooks
Rated hooks
Check the weight rating on every hook and rail
Walls at risk on move-out
Removable options
Avoid adhesive on fresh paint or textured walls
Unsure of starting condition
Photo record
Take photos before you move in and before you move out
Frequently Asked Questions
What is the cheapest way to organize my closet?
Start by sorting what you own and removing items you no longer wear. Then use things you already have, such as shoe boxes, baskets and a spare tension rod, before buying anything new. Inexpensive additions like over-the-door hooks, fabric bins and a few freestanding shelves can cover most needs without drilling. Pricing for these items varies by store, size and quantity, so compare current prices on the store’s website before you buy. Choose items that match your closet’s dimensions so you don’t pay for storage you can’t use.
How can I build a closet system cheaply without drilling?
Use freestanding and pressure-mounted parts instead of wall anchors. A tension rod can add a second hanging level, and a freestanding shelf unit can hold folded clothes and bins. Pair them with removable adhesive hooks rated for the weight you plan to hang. Before installing anything, check that the hooks and rods fit the closet’s width and that the load stays within the product’s stated limit. Remove adhesive products slowly to avoid paint damage when you move out.
How can I organize a very small closet in a rental?
Work upward and onto the door. Stack bins on a shelf, hang a shoe organizer on the back of the door and use multi-tier hangers to store several outfits on one hook. Keep frequently used items at eye level and seasonal items on the top shelf. Sort clothing by type so you can see everything at once. Measure the closet before you shop so the organizers you choose actually fit.
What can I use instead of shelves in a rental closet?
Freestanding wire cubes, rolling carts and plastic crates can replace built-in shelves, and none of them need to be attached to the wall. Over-the-door racks and hanging organizers add storage without fixing anything to the structure. Choose items you can move or fold when you relocate. Confirm that any freestanding unit is stable and sits flat on the floor.

 Add more eligible items to your cart to unlock free shipping.